Showing posts with label chives. Show all posts

Thursday, February 23, 2012

Bacon Cheddar Chive Scones

7 comments:
Bacon Cheddar Chive Scone

I'm resurrecting this oldie but goodie from my archives.  It's cold-weather comfort food, even if the temperatures have been remarkably high for the Boston area in February.  When I last posted this a couple years ago, they were a warming treat after a bout of shoveling in some snowstorm.  This year I haven't shoveled once (yay!), but these scones are just as enjoyable.

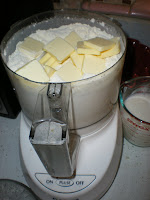
Scone ingredients

A food processor makes quick work of blending butter into the flour.  Crispy bacon and diced cheddar are stirred in, and the chives give the scones a nice bite.

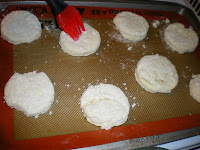
Unbaked scones

It helps to give the scones a stint in the freezer or fridge while the oven is preheating, since cold ingredients are the key to tall and flaky scones or biscuits.  Brush with cream, bake, put the kettle on to boil, and grab a good book.


Saturday, July 24, 2010

Chef Dennis' Corn Fritters

6 comments:
Corn Fritters

Chef Dennis writes about the delicious and healthy recipes he creates at a Pennsylvania prep school at More Than a Mount Full.  The squidgy cafeteria burgers, limp fries, and watered-down, soup-consistency ketchup of my youth can't be found on his blog.  Recently I saw a recipe for corn fritters he made that I just couldn't resist.  These were not just pancakes flecked with corn kernels, but crispy, airy, and slightly sweet.  What I was really impressed with was that the leftovers returned to their crispy state the day after when reheated in a toaster oven.  This is a perfect use for that farmers' market corn.

corn fritter 2
The batter is easy to throw together, and I love how colorful it is.  I had no scallions, but I have plenty of chives in my garden and they were a delicious substitute.

Corn Fritter
I used my trusty tablespoon scoop to measure out the fritters, and fried them until golden brown on each side before draining on paper towels.  They were excellent sprinkled with some fresh herbs and eaten with roasted vegetables.  They look smaller than the ones in Chef Dennis' photo, but I churned out 25.  Recipe after the jump.

Sunday, December 20, 2009

Bacon Cheddar Chive Scones

1 comment:
026

These scones were SO good after shoveling snow up to my knees outside, with flakes still falling everywhere.  I trudged back in, chilly and worn out, and baked these up.  They were delicious warm out of the oven, flaky but slightly gooey with the cheese.  I've only eaten sweet scones before, but this savory recipe has won me over.  Salty bacon, sharp cheddar, and fresh chives make the perfect wintry breakfast.

Tuesday, February 24, 2009

Buttermilk Biscuits with Cheese & Chives

No comments:

Forget that recipe I blogged over the summer. These are easier and more flavorful. They're delicious served warm, especially in the winter. Here I substituted Monterey Jack for white cheddar because it's what I had in the fridge again, and added chives because . . . well, why not?

Buttermilk Biscuits from Martha Stewart's Baking Handbook
4 cups all-purpose flour, plus more for dusting
1 tbs plus 1 tsp baking powder
1 tsp baking soda
1 tsp salt
1 tsp sugar
2 sticks (1 cup) unsalted butter, cold, cut into small pieces
1¾ cups buttermilk, plus more for brushing

Preheat the oven to 375°. In a large bowl, whisk together the flour, baking powder, baking soda, salt, and sugar. Using a pastry blender (I used a food processor), cut in the butter until the mixture resembles coarse crumbs with a few larger clumps remaining.


Pour in the buttermilk; using a rubber spatula, fold buttermilk into the dough, working in all directions and incorporating crumbs at the bottom of the bowl, until the dough just comes together. The dough will be slightly sticky; do not overmix.

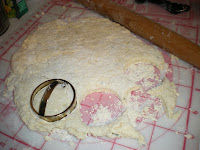
Turn out the dough onto a lightly floured work surface. With floured fingers, gently pat the dough into a round about 1 inch thick, pressing in any loose bits. Do not overwork the dough. Use a floured 2¼-inch round biscuit cutter to cut out the biscuits as close together as possible. (Use one cut edge as the edge for the next biscuit.)


Place the biscuits about 1½ inches apart on an unlined baking sheet. Generously brush the tops of the biscuits with buttermilk. Bake, rotating the sheet halfway through, until the biscuits are golden and flecked with brown spots, 18 to 20 minutes. Transfer the biscuits to a wire rack to cool.


Cheddar Biscuits Variation. Add 3 cups (9 ounces) grated sharp cheddar cheese to the flour mixture after the butter has been cut in. Proceed with the recipe.

Saturday, July 5, 2008

Back to Baking: Buttermilk Biscuits

No comments:


So the weather cooled down a bit today, and I was eager to use my oven again. I've been grilling outside and using my ice cream maker to make more frozen yogurt, but avoiding baking because the heat just gets unbearable. This recipe is from Rose Levy Berenbaum, and I used the more reliable weight measurements.


WeightVolumeIngredients
3 oz6 tbscold, unsalted butter
6.5 oz1 1/4 cupsBleached all-purpose flour
2.3 oz2/3 cupCake flour
.5 oz1 tbsBaking powder
1 tspSalt
1.3 oz3 tbsSugar
1.3 oz2 Large eggs, hard-cooked, yolks only
6.3 oz3/4 cupButtermilk or heavy cream (I used buttermilk)


You'll need a baking sheet plus a cushioned baking sheet OR 2 baking sheets, one on top of the other, lined with Silpat or parchment. You'll also need a baking stone (like a pizza stone) or a baking sheet.

Cut the butter and chill it. Place the oven rack at the middle level and put the stone or baking sheet on it. Preheat the oven to 400 degrees.

In a large bowl, whisk together the flour, baking powder, salt, and sugar. If White Lily self-rising flour is sold in your area, you can use 10 oz OR 2 cups of that, and omit the flours, baking powder, and salt in the chart above. Add the butter, and use your fingertips to press it into the flour until you get pieces that resemble coarse meal. Press the egg yolk through a fine strainer into the flour mixture, and whisk to distribute them evenly. Stir in the buttermilk, just until the flour is moistened and the dough starts to come together. Knead it on a lightly floured counter, and roll it 3/4 inch thick.

Dip a 2 1/2-inch round biscuit cutter or cookie cutter into a dish of flour before each cut (helps it not stick) and cut through the dough, lifting without twisting for maximum rise. Knead any leftover dough scraps and roll them out, repeating the process until you've used them all up. Place them an inch apart.

Place your baking sheet(s) on the hot baking stone or baking sheet, raise the temperature to 400 degrees, and bake for 5 minutes. Then lower the temperature to 375 degrees and bake 10 to 15 minutes more or until golden (an instant-read thermometer inserted in the center should say 200 degrees). The recipe yielded 12 biscuits for me.

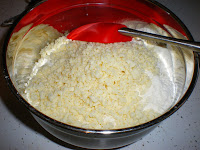
I have to confess I used my food processor to make the dough up to this point, instead of a pastry cutter or mushing anything by hand. It's just faster, and I whizzed the hard-boiled yolks in the food processor, too. Don't they look like lemon zest?


The recipe doesn't call for it, but I snipped in some chives from my herb box for half the biscuits. Why not?

For the other half, I mixed together a teaspoon of paprika with a dash of cayenne pepper, and kneaded some of that mixture into the dough, and use the remainder of the mixture to sprinkle on the tops.


It helps to cut your biscuits real close to each other, to minimize the necessity of re-rolling the dough.