Sunday, April 12, 2009

Rosemary Flatbread

No comments:
I was going to make buttermilk biscuits for Easter, but these were so much lighter and easier. You just combine the ingredients, let it rise for a bit, and bake off. Even the rolling out is simple, since the soft dough doesn't require the muscle that rolling out pastry does. They come out chewy, and crisp at the edges. I can see myself making these a lot, in endless variations.

Rosemary Flatbread, adapted from Martha Stewart Living
2¼ tsp active dry yeast (1 envelope)
¾ cup warm water (110 degrees)
2 cups all-purpose flour
Coarse sea salt
Cracked black pepper
1 tbs plus 1½ tsp extra-virgin olive oil, plus more for bowl and brushing
1 tbs chopped rosemary or other herb, plus more for decorating on top

Place a baking stone in a cold oven and preheat to 400 degrees. Combine yeast and water, and let stand until foamy, about 5 minutes. Stir well.

Pulse flour and 1 tsp salt in a food processor to combine. Add yeast mixture, oil, and rosemary. Process just until a dough forms. Turn dough onto a lightly floured surface. Knead for 1 minute. Shape into a ball. Place in an oiled bowl, and turn to coat. Cover loosely with plastic wrap. Let rise until doubled, about 1 hour.


Punch down the dough, and divide into 4 pieces. Gently roll each piece into a 6-inch disc. Don't roll them too thin, or they'll have the dryness and consistency of a cracker instead of the softness and texture of a bread. Brush with oil, sprinkle with salt and pepper, and decoratively top with pieces of rosemary.


Bake them one at a time on the baking stone without turning, for about 7 minutes each. A wooden pizza peel can make placement easy, and tongs make removal simple. If you're using a baking sheet because you don't have a baking stone, bake them for 10 to 12 minutes each.


Monday, March 30, 2009

Spinach in Small Bites

No comments:

I was amazed by the reception these spinach mini-tarts got. I knew they were good, but I didn't know they were that good! So I'm posting them here, and it's not my recipe and I haven't changed much except to show how to make them minis. Personally, I like the higher crust-to-filling ratio you get from the minis, and they're more fun for parties!

Oh, and I used Martha Stewart's pate brisee instead of the crust in the original recipe, which called for shortening. Shortening weirds me out, and the pate brisee was easy because I've got it committed to memory. I made them in a square tart mini pan with 2-inch wells that's cool because you push up the bottoms for easy extraction.

Mini Spinach & Pine Nut Tarts
Adapted from Emeril's
Pine Nut and Spinach Tart
Half-recipe of Martha Stewart's pate brisee
½ cup pine nuts (about 3 oz)
¼ cup olive oil
1 cup chopped yellow onion
10 oz fresh spinach, stems removed, well rinsed and chopped, or 1 10-ounce package frozen chopped spinach, thawed and squeezed to remove excess liquid
¾ teaspoon salt
½ teaspoon ground black pepper
3 large eggs
¾ cup heavy cream (I prefer half-and-half in this)
½ cup (about 3 oz) crumbled goat cheese, or feta

Preheat oven to 375°.
Roll out the chilled pate brisee and cut it into 2½-inch squares. Tuck each square into the wells of a mini-tart pan. A little excess riding above the sides of the wells is fine. Lightly wrap a sheet of foil over the top of the pan and bake for 5 minutes, then remove the foil and bake for 5 more. Allow the crusts to cool.

In a dry pan, toast the pine nuts for a few minutes until fragrant. Set the nuts aside. Heat the oil over medium-high heat, then add the onions and cook for 3 minutes. Add the spinach, salt, and pepper and cook the liquid is evaporated, 2 minutes. Remove from the heat and cool. In a large bowl whisk the eggs and cream (or half-and-half). Stir in the spinach, cheese, and half of the pine nuts. Spoon the filling into the crusts, almost to the top of each, and sprinkle the reserved nuts on top.

Set the pan on a baking sheet to avoid any leakage from dripping in the oven. Bake them for 20 minutes, until golden. When the pan is cool enough to handle, remove the tarts, then repeat with the remaining dough and filling. Makes about 30.

Thursday, March 19, 2009

Double Chocolate Mousse Cake

No comments:
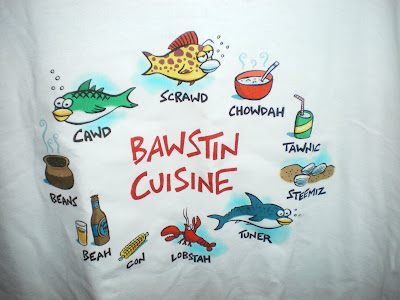
My buddy Nicole is moving back out West! So when we covertly planned her farewell at work, I decided to do a Red Velvet Cake with a Milk Chocolate Mousse and Dark Chocolate Mousse for my fellow chocolate lover. Unconventional, but she said it was "lethally good!" And check out this T-shirt we got her to remember us by.

I halved the recipe for Red Velvet Cupcakes and baked the batter as a single layer in an 8-inch springform pan at 350 degrees for 25 minutes (test for doneness by inserting a skewer or knife). Then I sawed it in half and put it aside for layering.


I used the mousses from a Francois Payard recipe on Epicurious:
3 1/2 cups (812 grams) heavy cream
5 ounces (142 grams) milk chocolate, finely chopped
5 ounces (142 grams) bittersweet chocolate, finely chopped

In the bowl of an electric mixer, using the whisk attachment, beat 2 1/2 cups (580 grams) of the heavy cream to soft peaks. Scrape half of the whipped cream into a medium bowl. Cover both bowls and refrigerate.

Put the milk and dark chocolate in two separate medium bowls. Bring the remaining 1 cup (232 grams) cream to a boil in a small saucepan. Pour 1/2 cup (116 grams) of the hot cream over the milk chocolate and the remaining 1/2 cup (116 grams) over the bittersweet chocolate. Gently whisk the milk chocolate until it is completely melted and the mixture is smooth. Whisk the dark chocolate until smooth.

Let the chocolate mixtures cool for 10 minutes. Fold the milk chocolate mixture into one bowl of whipped cream. Fold the dark chocolate into the remaining whipped cream.

For assembly, I put a cardboard round in the bottom of the springform pan, followed by the bottom half of the cake, cut side up. Spread the dark chocolate mousse in as even a layer as possible, then top it with the other half of the cake, cut side down. Spread the milk chocolate mousse on top of that. Cover tightly with plastic wrap to prevent refrigerator odors from sinking in, and chill for two to four hours.


When ready to serve, carefully remove the springform ring and take out the cake. Sift cocoa powder all over the top. Cut desired designs into a piece of parchment paper, then place paper on top of cake. Sift confectioners sugar over the paper so it falls only over the cutouts.

Wednesday, March 11, 2009

Neat Idea

No comments:

It was hard to locate things in my kitchen drawers. I'd often toss and shove around gadgets and utensils, which were all thrown together with no order. I'd seen online features for installing wooden dividers in drawers, but it seemed like too much work.


No-skid shelf-liner is great stuff -- it keeps everything stationary and prevents things from sliding around. Now everything has its place, and I even threw out a few things I don't need. Just buy the non-adhesive, no-skid kind, cut it to fit each drawer, and lay it down. Easy spring cleaning!

Saturday, February 28, 2009

DB Challenge: For the Love of Chocolate

12 comments:
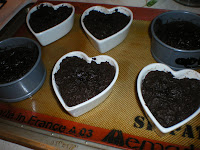
The Daring Bakers' February challenge was appropriately Valentines Day-themed, with heart-shaped Flourless Chocolate Cake topped with ice cream on the menu. We were able to choose our own flavors, so I made my easy go-to Vanilla Ice Cream and topped it with Hazelnut Praline. The chocolate had to be top-notch because the cake contained only three ingredients, making the taste and texture almost pure chocolate. I chose Callebaut 60%, and made little cakes in ramekins and small springform pans. It was dense and delicious, but I ultimately preferred my rich yet light Chocolate Souffle. Still, this is a sweet dessert for your valentine, and I love that a recipe by a chef from Malaysia was chosen (where some of my family is from).


Vanilla Ice Cream, Philadelphia Style
From Bruce Weinstein's The Ultimate Ice cream Book
3 cups heavy cream
3/4 cup plus 2 tbs sugar
2 tsp vanilla extract

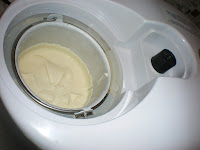
Heat the cream in a large heavy saucepan over medium heat until small bubbles appear around the edge. Do not let the cream boil. Remove from the heat and add the sugar, stirring until the sugar is completely dissolved. Allow the cream to cool slightly, then stir in the vanilla. Cover and refrigerate until cold or overnight.

Freeze in 1 or 2 batches in your ice cream machine according to the manufacturer's instructions. When finished, the ice cream will be soft but ready to eat. For firmer ice cream, transfer to a freezer-safe container and freeze at least 2 hours.

Hazelnut Praline
Based on Country Living recipe
1/4 lb. shelled and skinned hazelnuts, lightly toasted
1 cup sugar
1/4 cup water

Spread the nuts on a silicone mat, which won't stick to the praline. Put the sugar and water in a small saucepan and cover with a lid to avoid crystallization. Swirl the pot occasionally, but do not stir, over a medium-low heat. When the syrup turns an amber color, pour it immediately over the nuts. Let it set and cool for 30 minutes, then break it apart with your hands and put the pieces in a food processor. Pulse the nuts until they turn sandy, and sprinkle the praline over the vanilla ice cream.


THE CHALLENGE:
The February 2009 challenge is hosted by Wendy of WMPE's blog and Dharm of Dad ~ Baker & Chef.
We have chosen a Chocolate Valentino cake by Chef Wan; a Vanilla Ice Cream recipe from Dharm and a Vanilla Ice Cream recipe from Wendy as the challenge.

February’s challenge is a Flourless Chocolate Cake, Chocolate Valentino, inspired by Malaysia’s “most flamboyant food ambassador”, Chef Wan. Recipe comes from Sweet Treats by Chef Wan

What we Want You to Do:
-Use the following recipe
-Serve with - The original recipe calls for the cake to be served with whipping cream. BUT we decided to make this more of a challenge and ask you to make your own Ice Cream – a first for the DBrs. You can choose any flavour you want and any recipe although we provided two vanilla ice cream recipes. But we are giving you a little freedom here and will allow whipped cream as a topping as well or of course non-dairy whip. Be as creative as you want with your topping. Any fruit puree or sauce would be lovely with this cake.
- Use your favorite chocolate – the finished cake will taste exactly like the chocolate you use. Be creative with your chocolate, if you like a sweeter cake use milk chocolate or a combination of the semisweet and milk chocolate. If you like bittersweet chocolate use that and add sweetness by mixing the semi sweet with bittersweet. If you are daring, try white chocolate. (Dharm used all bittersweet and Wendy used a half bitter/half semi sweet chocolate).
- A higher cocoa percentage increases the bitterness of the chocolate.
-Equipment - it is optional to use a heart shaped pan. For a real Valentino, bake it in a heart shaped pan or cut it out into a heart shape. You may use any shape pan that gives you an area of 50” - 6x8 or 7x7. An 8” spring form pan works with great results as do smaller pans or ramekins.-An instant read thermometer highly recommended.

Note on recipe - the recipe consists of 3 simple ingredients and how you interpret them is part of the challenge. The simplicity of this recipe gives credit to the ingredients much in the same way of French baguette.
-This recipe comes together very quickly with a hand mixer.
-This is a very decadent cake that will sink a little as it cools but will still hold its shape.
-Very dense and fudgy cake that tastes divine.
-The top forms a light crust kind of like a brownie

Posting Date: February 28, 2009
Printable Recipe:

Chocolate Valentino
Preparation Time: 20 minutes
16 ounces (1 pound) (454 grams) of semisweet chocolate, roughly chopped
½ cup (1 stick) plus 2 tablespoons (146 grams total) of unsalted butter
5 large eggs separated

1. Put chocolate and butter in a heatproof bowl and set over a pan of simmering water (the bottom of the bowl should not touch the water) and melt, stirring often.
2. While your chocolate butter mixture is cooling. Butter your pan and line with a parchment circle then butter the parchment.
3. Separate the egg yolks from the egg whites and put into two medium/large bowls.
4. Whip the egg whites in a medium/large grease free bowl until stiff peaks are formed (do not over-whip or the cake will be dry).
5. With the same beater beat the egg yolks together.
6. Add the egg yolks to the cooled chocolate.
7. Fold in 1/3 of the egg whites into the chocolate mixture and follow with remaining 2/3rds. Fold until no white remains without deflating the batter. {link of folding demonstration}
8. Pour batter into prepared pan, the batter should fill the pan 3/4 of the way full, and bake at 375F/190C
9. Bake for 25 minutes until an instant read thermometer reads 140F/60C. Note – If you do not have an instant read thermometer, the top of the cake will look similar to a brownie and a cake tester will appear wet.
10. Cool cake on a rack for 10 minutes then unmold.

Dharm's Ice Cream Recipe
Classic Vanilla Ice Cream
Preparation Time: 30 minutes

Recipe comes from the Ice Cream Book by Joanna Farrow and Sara Lewis (tested modifications and notes in parentheses by Dharm)

Ingredients
1 Vanilla Pod (or substitute with vanilla extract)
300ml / ½ pint / 1 ¼ cups Semi Skimmed Milk – in the U.S. this is 2% fat (or use fresh full fat milk that is pasteurised and homogenised {as opposed to canned or powdered}). Dharm used whole milk.
4 large egg yolks
75g / 3oz / 6 tbsp caster sugar {superfine sugar can be achieved in a food processor or use regular granulated sugar}
5ml / 1 tsp corn flour {cornstarch}
300ml / ½ pint / 1 ¼ cups Double Cream (48% butter fat) {in the U.S. heavy cream is 37% fat)
{you can easily increase your cream's fat content by heating 1/4 cup of heavy cream with 3 Tbs of butter until melted - cool to room temperature and add to the heavy cream as soon as whisk marks appear in the cream, in a slow steady stream, with the mixer on low speed. Raise speed and continue whipping the cream) or use heavy cream the difference will be in the creaminess of the ice cream.

1. Using a small knife slit the vanilla pod lengthways. Pour the milk into a heavy based saucepan, add the vanilla pod and bring to the boil. Remove from heat and leave for 15 minutes to allow the flavours to infuseLift the vanilla pod up. Holding it over the pan, scrape the black seeds out of the pod with a small knife so that they fall back into the milk. SET the vanilla pod aside and bring the milk back to the boil.
2. Whisk the egg yolks, sugar and corn-flour in a bowl until the mixture is thick and foamy.
3. Gradually pour in the hot milk, whisking constantly. Return the mixture to the pan and cook over a gentle hear, stirring all the time
4. When the custard thickens and is smooth, pour it back into the bowl. Cool it then chill.
5. By Hand: Whip the cream until it has thickened but still falls from a spoon. Fold it into the custard and pour into a plastic tub or similar freeze-proof container. Freeze for 6 hours or until firm enough to scoop, beating it twice (during the freezing process – to get smoother ice cream or else the ice cream will be icy and coarse)
By Using and Ice Cream Maker: Stir the cream into the custard and churn the mixture until thick (follow instructions on your ice cream maker)

Wendy's Ice Cream Recipe
Vanilla Philadelphia Style Recipe
Preparation Time: 5 minutes
2 cups (473 ml) of half and half (1 cup of heavy cream and 1 cup of whole, full fat milk)
1 cup (237 ml) heavy cream
2/3 (128 grams) cup sugar
Dash of salt
1 (12 grams) tablespoon of vanilla

Mix all ingredients together (we do this in a plastic pitcher and mix with an emulsifier hand blender-whisking works too).
Refrigerate for 30 minutes or longer
Mix in your ice cream maker as directed.

David Lebovitz link for making ice cream if you do not have an ice cream freezer.

Links to helpful tips:
Folding video demonstration.
Egg Whipping video demonstration.

Tuesday, February 24, 2009

Buttermilk Biscuits with Cheese & Chives

No comments:

Forget that recipe I blogged over the summer. These are easier and more flavorful. They're delicious served warm, especially in the winter. Here I substituted Monterey Jack for white cheddar because it's what I had in the fridge again, and added chives because . . . well, why not?

Buttermilk Biscuits from Martha Stewart's Baking Handbook
4 cups all-purpose flour, plus more for dusting
1 tbs plus 1 tsp baking powder
1 tsp baking soda
1 tsp salt
1 tsp sugar
2 sticks (1 cup) unsalted butter, cold, cut into small pieces
1¾ cups buttermilk, plus more for brushing

Preheat the oven to 375°. In a large bowl, whisk together the flour, baking powder, baking soda, salt, and sugar. Using a pastry blender (I used a food processor), cut in the butter until the mixture resembles coarse crumbs with a few larger clumps remaining.


Pour in the buttermilk; using a rubber spatula, fold buttermilk into the dough, working in all directions and incorporating crumbs at the bottom of the bowl, until the dough just comes together. The dough will be slightly sticky; do not overmix.

Turn out the dough onto a lightly floured work surface. With floured fingers, gently pat the dough into a round about 1 inch thick, pressing in any loose bits. Do not overwork the dough. Use a floured 2¼-inch round biscuit cutter to cut out the biscuits as close together as possible. (Use one cut edge as the edge for the next biscuit.)


Place the biscuits about 1½ inches apart on an unlined baking sheet. Generously brush the tops of the biscuits with buttermilk. Bake, rotating the sheet halfway through, until the biscuits are golden and flecked with brown spots, 18 to 20 minutes. Transfer the biscuits to a wire rack to cool.


Cheddar Biscuits Variation. Add 3 cups (9 ounces) grated sharp cheddar cheese to the flour mixture after the butter has been cut in. Proceed with the recipe.

Wednesday, February 18, 2009

The Best Mac and Cheese

No comments:

That's how people describe this dish when they taste it. My personal touch is a topping of homemade breadcrumbs for extra flavor and some crunch. If you must use storebought breadcrumbs, at least buy Panko so you get large-textured crumbs.

I sometimes substitute the cheddar for Monterey Jack, which tastes similar but doesn't exude as much oil as cheddar. And feel free to cut the amount of cheese by a cup -- it'll still be incredibly cheesy.

White Cheddar Macaroni and Cheese from Tyler Florence's Real Kitchen
1 pound elbow macaroni (I use shells, which hold the cheese nicely)
3 tbs unsalted butter
3 tbs all-purpose flour
3 cups milk
4 cups shredded sharp white Cheddar cheese, plus 1 cup for the top
Sea salt and freshly ground black pepper

Cook the macaroni in lightly salted boiling water for about 10 minutes, until tender but still firm. Drain well and set aside.

Preheat the oven to 400 degrees. In a deep skillet, melt the butter over medium heat. Add the flour to make a roux and cook, stirring constantly, to remove any lumps. Pour in the milk and cook until the mixture is thick and smooth, still stirring all the while. Stir in 4 cups of the Cheddar and continue to cook and stir until the cheese melts. Season with salt and pepper. Add the cooked macaroni and fold to incorporate. Transfer the mixture to a 3-quart baking dish. Sprinkle the top with the remaining cup of shredded cheese. (Here I sprinkle the homemade breadcrumbs on top.) Bake for 30 minutes, until hot and bubbly.


Homemade Breadcrumbs
I tear up two slices of white bread and put the chunks in the food processor. Pulse until you have large crumbs. Empty them into a bowl and drizzle with a teaspoon of olive oil, then toss immediately. The oil will help the crumbs brown nicely.