Monday, November 25, 2013
Salted Caramel Apple Pie
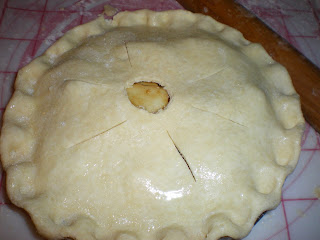
You might be asking, another pie?? But it's pie season, and this one is so good! This is not just any apple pie, but one with homemade salted caramel stirred into the filling, and additional caramel poured on top when served. The big apple slices hold their shape and juiciness, and the caramel makes the filling wonderfully saucy.
This pie is also different because I finally decided to test-drive a recipe for a yogurt-butter crust, and I can report that it is super flaky and easy to roll out. It wasn't so easy to assemble. For the first time I used a handheld pastry blender like the recipe called for, rather than my food processor. I've concluded that I'm lazy and prefer the machine, plus I feel like the machine works the dough less. And we all know that working the dough less ensures tender pastry. Also, while the yogurt works as a tenderizer, there simply wasn't enough moisture to bring the dough together. I added about a quarter-cup extra water along with another teaspoon of yogurt. I could chalk this up to the awfully dry conditions at home during fall and winter. But continuing to work in the extra liquid made me afraid I was overworking the dough. The pastry still came out tender, but next time I'll go the lazy route and use the machine.
Finally, the caramel is simple to make, and I didn't even break out my candy thermometer. But if you're short on time, I think storebought salted caramel would work just as well. One last tip: I'm always afraid of crystallization when making caramels and syrups, so I put the lid on the pot for 2 minutes during the vigorous stage of boiling -- the steam builds up and washes down the sides, along with any crystals that have formed. Both the pie dough and the caramel can be made a day or so in advance, and refrigerated until needed. Microwave the caramel to make it warm and pourable before using. Have a good Thanksgiving, folks, and may it be filled with pie.
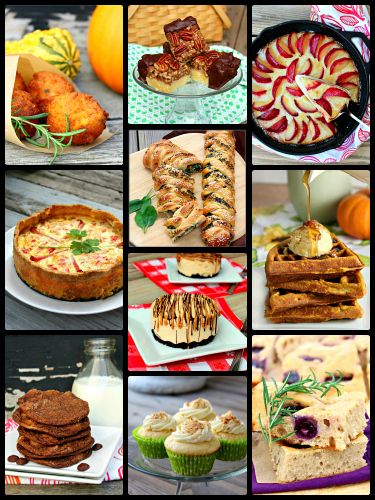
Looking for other Thanksgiving dessert ideas? Here's a few:
Thursday, October 24, 2013
Vanilla-Bean Pear & Apple Tart
I have a zillion apples to get through after apple picking. There's something about fall that makes you bypass even the farmers markets and head for the orchards to pick your own. Is it the gorgeous foliage views, the hay rides, the cider doughnuts? When we first arrived, the aroma of cider doughnuts was intoxicating, and they tasted just as good as they smelled. With doughnuts in our bellies, we picked more apples than we needed. And I knew the purpose most of them were meant for: pies. With that in mind, the bulk of our apples were Golden Delicious and Mutsu, which hold their shape well when baked.
I was looking for a new way to do apple pie -- I've done traditional double crust, tarts, turnovers, hand pies, and crostatas. The recipe I chose involved simmering the apples with some Red Devoe pears in a bath of melted butter and vanilla bean, and they were baked into the pie topped with a walnut lattice crust. Apple, pear, butter, and vanilla bean combined are truly heavenly, and the chunky pieces of fruit were juicy. Except... the bottom crust was soggy and the recipe called for an unusual lattice that came with no instructions: the strips were wide with no spaces between them. I've made several lattice pies before so I wrangled one, but it was fussy. So I set about re-creating the recipe.
Enter this tart. It's shallower than a pie and has a lot less fruit, so no soggy bottom crust. No tricky lattice dough to contend with, and no walnuts to blend into it. I kept the blend of pears and apples, sprinkling them with vanilla sugar and dotting the whole thing with cold butter. Much easier and faster than the pie, which was a production. I might cut the fruit thicker next time because I did miss the big, juicy chunks from the pie. It also didn't have as much vanilla-butter sauciness as the pie, but tarts are generally drier like that. Don't substitute that vanilla bean with extract! Go ahead and splurge on a bean, because it makes a world of difference. Now I've just got to work my way through about a bushel more of apples!
Thursday, October 11, 2012
Maple-Glazed Apple Crostata
I always look forward to baking an apple pie in the fall. The oven warms the house, and fills it with the smells of cinnamon and nutmeg. My favorite is a traditional double-crust apple pie, but it's kind of a production. So when I don't have all day, I turn to open-faced pies like this crostata. I had made an apple crostata previously with cranberries, but plain ol' apple is usually what I want. This version is packed with apples. The recipe calls for just dumping them all onto the dough, but I wanted a fancier look. Unfortunately, shingling the apples instead of dumping them into one big mound meant not all of them fit, plus they were so packed in that the slices became vertical instead of slanted. No matter, still delicious. My aesthetic quibble was actually the crust edges -- I didn't think the crostata needed a 3-inch border like the recipe called for so I went with 2 inches, and you can see it came up short. But like I said, still delicious.
And it still managed to wow a crowd. With the leftover apples that didn't fit, I made a halved recipe for the crostata, resulting in this smaller one we ate at home. I used gala apples, which have great flavor and hold their shape well during baking. And the bulk bag of organic galas cost the same per pound as the loose galas. My one disappointment with this recipe was that you don't really taste the maple syrup you brush on the apples at the very end. I suggest skipping that step, or using more syrup and then telling me how that turned out.
Thursday, November 3, 2011
Apple Butter Hand Pies
I have only one complaint about this recipe, and it's that these mini-pies can't hold any more apple butter. So I spread more on top of a hand pie like it's toast. But spoon more apple butter inside and it just squeezes out the sides when the pastry is folded up. The crust is nice too, made tender and slightly tangy with the addition of cream cheese, and sprinkled with cinnamon sugar. It comes out softer than your usual pie crust, almost like a cookie. The pies are also good reheated in the toaster oven the day after.
The apple butter took some time to make, but not much work. I used 6 pounds of Galas from the farmers market. It was my first taste ever of apple butter, and I found it to be somewhere between applesauce and apple pie filling, and nicely spiced with cinnamon, nutmeg, cardamom, and clove. You won't use it all up in the pies like the recipe indicates, but that's all right with me: The apple butter is also great on top of pancakes, or as part of a grilled cheese sandwich. I think pear butter has to be next on my list.
Tuesday, October 12, 2010
Apple Cranberry Crostata
But maybe that was too free-form for me, because I had this compulsion to also try the tart in a square pan. I don't know. . . squares and clean rows appeal to me. It tastes good either way, but I like the sugary crust of the round crostata. A slice topped with some whipped cream is all the better. The cranberries lend a tartness you don't get in ordinary apple pie.
Clockwise from top-left: I used the food processor for even slices -- except they weren't so even and I sliced my finger on the blade, so it's the knife next time for me. I used Granny Smiths and MacIntoshes. The dough is rolled out into a large circle. The filling is mounded in the center, and you can dump it all at once or lay out concentric circles. The square tart is assembled and baked, then topped with apples cut out from dough scraps. The round crostata has its sides folded up, is brushed with egg wash, dusted with sanding sugar, and ready to go in the oven.
Monday, November 16, 2009
Applesauce Doughnuts
Monday, October 5, 2009
Apple Pie, 2.0
I can't help it -- it's an old favorite, especially in the fall! I'm kind of recycling a post, but I really do use my tried and true recipes over and over again. And with the weather getting chilly, it's been perfect lately for turning on that oven and making something comforting. Plus, it fills your home with the most wonderful aromas of apple, cinnamon, and nutmeg.
This time, I added some apple cutouts for a decorative touch. Bake them on a sheet pan for 10 minutes while the pie is baking. When the pie has cooled a bit, affix your cutouts using some corn syrup.
This recipe is from Rose Levy Beranbaum's Pie and Pastry Bible. Her cream cheese pie dough has become my favorite for its flakiness, slight tang, and ease in rolling out. She explains in the book that cream cheese has a high water content that's great for the pastry. My other reasons for liking this pie (the baking reasons, not the obvious eating ones) include baking the pie on a baking stone on the floor of the oven to avoid that awful soggy bottom crust, and cooking the juices of the apples to concentrate the flavor. True, I spent a good few hours making this, but the extra steps are rewarding in the end. Keep in mind when planning that you can't eat it for a few hours, or the juices will run out everywhere before they've had a chance to set. I won't repost the recipe, since you can find it here.
Sunday, November 23, 2008
Even better . . . Apple Pie!
2½ pounds baking apples (about 6 medium), peeled cored, and sliced ¼ inch thick
1 tbs freshly squeezed lemon juice
¼ cup light brown sugar (scant 2 oz.)
¼ cup granulated sugar (1.75 oz.)
1 tsp ground cinnamon
¼ tsp ground nutmeg
¼ tsp salt
2 tbs butter (1 oz.)
1 tbs + 1 tsp cornstarch (0.5 oz.)
Between two sheets of plastic wrap, roll the bottom crust dough ⅛ inch thick and 12 inches in diameter. Transfer it to the pie pan. Trim the edge almost even with the edge of the pan. Cover it with plastic wrap and refrigerate it for 30 minutes to 3 hours.
In a large bowl, combine the apples, lemon juice, sugars, cinnamon, nutmeg, and salt, and toss to mix. Allow the apples to macerate at room temperature for 30 minutes to 3 hours.
Transfer the apples and their juices to a colander suspended over a bowl to capture the liquid. The mixture will release at least ½ cup of liquid. In a small saucepan (preferably nonstick), over medium-high heat, boil down this liquid, with the butter, to about ⅓ cup, or until syrupy and lightly caramelized. Swirl the liquid, but do not stir it. Transfer the apples to a bowl and toss them with the cornstarch until all traces of it have disappeared.
Pour the syrup over the apples, tossing gently. Do not be concerned if the liquid hardens on contact with the apples; it will dissolve during baking.
Roll out the top crust large enough to cut a 12-inch circle. Transfer the apple mixture to the pie shell. Moisten the border of the bottom crust by brushing it lightly with water and place the top crust over the fruit. Tuck the overhang under the bottom crust border and press down all around the top to seal it. Crimp the border using a fork or your fingers, and make about 5 evenly spaced 2-inch slashes for steam to escape. Cover the pie loosely with plastic wrap and refrigerate it for 1 hour before baking to chill and relax the pastry. This will maintain flakiness and help keep the crust from shrinking. (I brush some beaten egg white on the crust and sprinkle it with sugar.)
Preheat the oven to 425° at least 20 minutes before baking. Set an oven rack on the lowest level and place a baking stone or baking sheet on it before preheating. Place a large piece of greased foil on top to catch any juices. Set the pie directly on the foil-topped baking stone and bake for 45 to 55 minutes or until the juices bubble through the slashes. After 30 minutes in the oven, protect the edges from overbrowning with a foil ring. Cool the pie on a rack for at least 4 hours before cutting. Serve warm or at room temperature.
12 tbs unsalted butter, cold (6 oz.)
2 cups all-purpose flour (10 oz.)
¼ tsp salt
¼ tsp baking powder
4.5 oz. cream cheese, cold
2 tbs ice water
1 tbs cider vinegar
Cut the butter into small cubes. Freeze it until frozen solid, about 30 minutes. Place the flour, salt, and baking powder in a reclosable gallon-size freezer bag and freeze for at least 30 minutes. Place the flour mixture in a food processor with the metal blade and process for a few seconds to combine. Set the bag aside.
Cut the cream cheese into 3 or 4 pieces and add it to the flour. Process for about 20 seconds or until the mixture resembles coarse meal. Add the frozen butter cubes and pulse until none of the butter is larger than the size of a pea. Add the water and vinegar. Pulse until most of the butter is reduced to the size of small peas. The mixture will be in particles and will not hold together. Spoon it into the plastic bag.
Holding both ends of the bag opening with your fingers, knead the mixture, pressing it from the outside of the bag, until the mixture holds together in one piece and feels slightly stretchy when pulled. Wrap the dough with plastic wrap, flatten it into 2 discs, and refrigerate at least 45 minutes, or overnight.
My notes: I didn't freeze the butter, using it straight from the refrigerator. I also didn't freeze the flour mixture, and kneaded the dough in a bowl instead of a bag. The crust still came out great.
Wednesday, November 12, 2008
Apple Turnovers
These are delicious and easy to make. I used the Tender Cream Cheese Pastry dough from Ken Haedrich's Pie, and it had recipes for turnovers with various fillings, but not apple. I was craving apple filling. So I winged it, throwing in the usual cinnamon and sugar, with some flour for thickening, and adapting the cutting, shaping, and baking instructions. Luckily, it worked!
2 apples (use apples good for baking), cored and peeled
2 tsp flour
¼ cup sugar
1 tsp cinnamon
1 egg beaten with 1 tbs water
Cut the apples into a small dice. Toss them in a bowl with the flour, sugar, and cinnamon.
Roll each ball of dough out to 6 inches by 6 inches and trim the edges straight with a pastry wheel or knife. Place 3 tbs of the apple filling on each square of dough, and brush the border with egg wash. Fold the dough over into a triangle, and use a fork to crimp and seal the edges (merely pinching them resulted in some leakage the first time). Place the turnovers on two baking sheets lined with silicone mats or parchment paper. Cut three small slits into the top of each turnover to allow steam to escape. At this point, you can freeze some or all of them -- bake frozen turnovers, without thawing, for a few minutes longer.
When ready to bake, brush the tops with egg wash, and sprinkle each turnover with a pinch of sugar. Lower the oven temperature to 375° and bake for 20 minutes, rotating the sheets halfway through baking. Eat them warm or at room temperature.
Tender Cream Cheese Pastry from Ken Haedrich's Pie2 sticks unsalted butter, softened
8 oz. cream cheese, softened
½ tsp salt
2 tbs sifted confectioners sugar
2¾ cup all-purpose flour
Combine the butter, cream cheese, and salt in the bowl of a stand mixer fitted with the flat beater attachment. Blend for 30 to 45 seconds on medium-low speed. Stopping the machine before each addition, add the confectioners sugar and 1 cup of the flour. With the mixer on low, blend until the flour is incorporated. Add another 1 cup of the flour and blend. Add the remaining flour. When all of the flour has been added and the dough starts to ball up around the beater, stop the machine. Remove the bowl and scrape the dough onto a lightly floured work surface.
Knead 2 or 3 times, then divide the dough equally into 8 balls to make turnovers. Flatten them into disks, then wrap them in plastic and refrigerate for at least one hour.