Sunday, November 23, 2008

Even better . . . Apple Pie!

1 comment:

I thought the apple turnovers I made a couple of weeks ago were great, and like this pie, they used a cream cheese crust. But this pie was unbelievably flaky and even crispy at the edges. It does involve a lot of steps, but Rose Levy Berenbaum knows what she's doing. For example, she calls for putting the pie plate directly on a baking/pizza stone. That kept the bottom cooking, avoiding that soggy bottom pies are sometimes prone to. Her recipe also includes cooking the fruit juices on the stove top, concentrating and thickening them. It may have been a bit of work, but I'll be making this again.

Classic Apple Pie from Rose's Pie and Pastry Bible
Flaky Cream Cheese Pie crust for 2-crust, 9-inch pie (recipe follows)
2½ pounds baking apples (about 6 medium), peeled cored, and sliced ¼ inch thick
1 tbs freshly squeezed lemon juice
¼ cup light brown sugar (scant 2 oz.)
¼ cup granulated sugar (1.75 oz.)
1 tsp ground cinnamon
¼ tsp ground nutmeg
¼ tsp salt
2 tbs butter (1 oz.)
1 tbs + 1 tsp cornstarch (0.5 oz.)

Between two sheets of plastic wrap, roll the bottom crust dough ⅛ inch thick and 12 inches in diameter. Transfer it to the pie pan. Trim the edge almost even with the edge of the pan. Cover it with plastic wrap and refrigerate it for 30 minutes to 3 hours.

In a large bowl, combine the apples, lemon juice, sugars, cinnamon, nutmeg, and salt, and toss to mix. Allow the apples to macerate at room temperature for 30 minutes to 3 hours.

Transfer the apples and their juices to a colander suspended over a bowl to capture the liquid. The mixture will release at least ½ cup of liquid. In a small saucepan (preferably nonstick), over medium-high heat, boil down this liquid, with the butter, to about ⅓ cup, or until syrupy and lightly caramelized. Swirl the liquid, but do not stir it. Transfer the apples to a bowl and toss them with the cornstarch until all traces of it have disappeared.

Pour the syrup over the apples, tossing gently. Do not be concerned if the liquid hardens on contact with the apples; it will dissolve during baking.


Roll out the top crust large enough to cut a 12-inch circle. Transfer the apple mixture to the pie shell. Moisten the border of the bottom crust by brushing it lightly with water and place the top crust over the fruit. Tuck the overhang under the bottom crust border and press down all around the top to seal it. Crimp the border using a fork or your fingers, and make about 5 evenly spaced 2-inch slashes for steam to escape. Cover the pie loosely with plastic wrap and refrigerate it for 1 hour before baking to chill and relax the pastry. This will maintain flakiness and help keep the crust from shrinking. (I brush some beaten egg white on the crust and sprinkle it with sugar.)
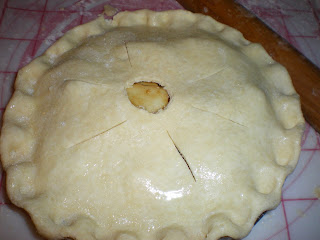

Preheat the oven to 425° at least 20 minutes before baking. Set an oven rack on the lowest level and place a baking stone or baking sheet on it before preheating. Place a large piece of greased foil on top to catch any juices. Set the pie directly on the foil-topped baking stone and bake for 45 to 55 minutes or until the juices bubble through the slashes. After 30 minutes in the oven, protect the edges from overbrowning with a foil ring. Cool the pie on a rack for at least 4 hours before cutting. Serve warm or at room temperature.

Rose's Flaky Cream Cheese Pie Crust
12 tbs unsalted butter, cold (6 oz.)
2 cups all-purpose flour (10 oz.)
¼ tsp salt
¼ tsp baking powder
4.5 oz. cream cheese, cold
2 tbs ice water
1 tbs cider vinegar

Cut the butter into small cubes. Freeze it until frozen solid, about 30 minutes. Place the flour, salt, and baking powder in a reclosable gallon-size freezer bag and freeze for at least 30 minutes. Place the flour mixture in a food processor with the metal blade and process for a few seconds to combine. Set the bag aside.

Cut the cream cheese into 3 or 4 pieces and add it to the flour. Process for about 20 seconds or until the mixture resembles coarse meal. Add the frozen butter cubes and pulse until none of the butter is larger than the size of a pea. Add the water and vinegar. Pulse until most of the butter is reduced to the size of small peas. The mixture will be in particles and will not hold together. Spoon it into the plastic bag.

Holding both ends of the bag opening with your fingers, knead the mixture, pressing it from the outside of the bag, until the mixture holds together in one piece and feels slightly stretchy when pulled. Wrap the dough with plastic wrap, flatten it into 2 discs, and refrigerate at least 45 minutes, or overnight.

My notes: I didn't freeze the butter, using it straight from the refrigerator. I also didn't freeze the flour mixture, and kneaded the dough in a bowl instead of a bag. The crust still came out great.

Thursday, November 20, 2008

Easy Butternut Squash Soup

No comments:

The best butternut squash soup I've ever had was at the Museum of Fine Arts cafe here in Boston. I haven't been able to find a recipe like it, but this one is pretty good, too, and probably healthier. I just roast a squash with onion and garlic, and whiz it in the food processor. And don't skimp on the cream: trust me, it's a small amount and it's better with.
Butternut Squash Soup
1 butternut squash
1 small yellow onion,quartered
1 head garlic
2½ cups chicken broth
¼ tsp freshly grated nutmeg
¼ cup cream
Salt and pepper to taste

Preheat the oven to 400°. Roast your squash one of two ways. Slice it lengthwise, unpeeled, and scoop out the seeds; then place it face-down on a baking tray (you can lightly oil the cut side if you're not using a silicone mat). Or dice the squash, peeled, into bite-sized cubes, and toss with a tablespoon of olive oil. Use a very sharp knife, since the squash is hard to cut.


Place the garlic on a sheet of foil and drizzle with a bit of olive oil, then wrap up the garlic in the foil. Drizzle a bit of olive oil on the onion quarters as well. Place the onion and garlic on the baking sheet, and roast all the vegetables for an hour, until the flesh is easily pierced with a fork (the halved squash might take an extra 15 minutes).
When the vegetables have cooled a bit, remove half of the roasted cloves from the head of garlic, and out of their skins. Puree them with the onion and about 5 cups of the squash (you can increase quantities of the other ingredients if you have more squash) in a blender or food processor. You may need to add half of the chicken broth if the blade gets stuck. Pour the puree into a pot, adding the rest of the chicken broth, and heat the soup. Add the nutmeg and salt and pepper to taste, and stir in the cream. Serve with a crusty piece of bread, spread with some of the remaining roasted garlic, if you like.

Wednesday, November 12, 2008

Apple Turnovers

No comments:

These are delicious and easy to make. I used the Tender Cream Cheese Pastry dough from Ken Haedrich's Pie, and it had recipes for turnovers with various fillings, but not apple. I was craving apple filling. So I winged it, throwing in the usual cinnamon and sugar, with some flour for thickening, and adapting the cutting, shaping, and baking instructions. Luckily, it worked!

APPLE TURNOVERS
Tender cream cheese pastry dough (recipe follows)
2 apples (use apples good for baking), cored and peeled
2 tsp flour
¼ cup sugar
1 tsp cinnamon
1 egg beaten with 1 tbs water

Preheat oven to 400°.

Cut the apples into a small dice. Toss them in a bowl with the flour, sugar, and cinnamon.

Roll each ball of dough out to 6 inches by 6 inches and trim the edges straight with a pastry wheel or knife. Place 3 tbs of the apple filling on each square of dough, and brush the border with egg wash. Fold the dough over into a triangle, and use a fork to crimp and seal the edges (merely pinching them resulted in some leakage the first time). Place the turnovers on two baking sheets lined with silicone mats or parchment paper. Cut three small slits into the top of each turnover to allow steam to escape. At this point, you can freeze some or all of them -- bake frozen turnovers, without thawing, for a few minutes longer.


When ready to bake, brush the tops with egg wash, and sprinkle each turnover with a pinch of sugar. Lower the oven temperature to 375° and bake for 20 minutes, rotating the sheets halfway through baking. Eat them warm or at room temperature.

Tender Cream Cheese Pastry from Ken Haedrich's Pie
2 sticks unsalted butter, softened
8 oz. cream cheese, softened
½ tsp salt
2 tbs sifted confectioners sugar
2¾ cup all-purpose flour

Combine the butter, cream cheese, and salt in the bowl of a stand mixer fitted with the flat beater attachment. Blend for 30 to 45 seconds on medium-low speed. Stopping the machine before each addition, add the confectioners sugar and 1 cup of the flour. With the mixer on low, blend until the flour is incorporated. Add another 1 cup of the flour and blend. Add the remaining flour. When all of the flour has been added and the dough starts to ball up around the beater, stop the machine. Remove the bowl and scrape the dough onto a lightly floured work surface.

Knead 2 or 3 times, then divide the dough equally into 8 balls to make turnovers. Flatten them into disks, then wrap them in plastic and refrigerate for at least one hour.

Friday, October 31, 2008

Happy Halloween!

1 comment:


I just got around to carving my pumpkin today. Mine's the "village" one with windowpanes, and the "Aku" one is Joe's.

Thursday, October 30, 2008

Daring Bakers Challenge: Pizza!

6 comments:
Growing up in the Bensonhurst section of Brooklyn, N.Y., I was surrounded by Italians and, consequently, excellent pizza. Outside New York City, pizza wasn't always so good, but with this Daring Bakers challenge I've learned to make a darned good one in my oven! True, Joe the Residential Pizza Maker had made this exact one many times before, but I'd always been a spectator and consumer, never the maker. This time, I watched and learned and tossed dough.

When it comes to pizza, I'm a less-is-more gal. Friends who know me as a meat lover may find it strange that I don't like meat on my pizza, but chicken or beef weighs it down. And I sure don't want servings of baked ziti on top, and I prefer the traditional sauce-and-mozzarella version. I like a topping of tomato slices with fresh basil, or my other favorite, which I made here -- Roasted Eggplant & Caramelized Onions. You may say you don't like eggplant (eggplant parmigiana seems to be everyone's exception), and I used to say that, too. But try eggplant roasted, slightly caramelized and well done, and it's nothing like that spongy, underdone stuff that restaurants sometimes serve up.

I roast a skinny Chinese eggplant (peeled, sliced, and tossed with olive oil, salt, and pepper) in a 300-degree oven for 15 minutes. I also caramelize some onions in a saute pan with a bit of olive oil, salt, and pepper until they're translucent and slightly brown at the edges. Toss them on top of your pizza before it goes into the oven.


From Peter Reinhart's The Bread Baker’s Apprentice
Makes 6 pizza crusts (about 9-12 inches/23-30 cm in diameter)
Ingredients:
4½ cups (20¼ ounces/607.5 g) unbleached high-gluten (14%) bread flour or all-purpose flour, chilled
1¾ tsp salt
1 tsp instant yeast
¼ cup (2 ounces/60g) olive oil (Optional, but it’s better with)
1¾ cups (14 ounces/420g or 420ml) water, ice cold (40° F/4.5° C)
1 tbs sugar
Semolina/durum flour or cornmeal for dusting
1. Mix together the flour, salt and instant yeast in a big bowl (or in the bowl of your stand mixer).
2. Add the oil, sugar, and cold water and mix well (with the help of a large wooden spoon or with the paddle attachment, on low speed) in order to form a sticky ball of dough. On a clean surface, knead for about 5-7 minutes, until the dough is smooth and the ingredients are homogeneously distributed. If it is too wet, add a little flour (not too much, though) and if it is too dry add 1 or 2 teaspoons extra water.
NOTE: If you are using an electric mixer, switch to the dough hook and mix on medium speed for the same amount of time.The dough should clear the sides of the bowl but stick to the bottom of the bowl. If the dough is too wet, sprinkle in a little more flour, so that it clears the sides. If, on the contrary, it clears the bottom of the bowl, dribble in a teaspoon or two of cold water.The finished dough should be springy, elastic, and sticky, not just tacky, and register 50°-55° F/10°-13° C.
3. Flour a work surface or counter. Line a jelly pan with baking paper/parchment. Lightly oil the paper.
4. With the help of a metal or plastic dough scraper, cut the dough into 6 equal pieces (or larger if you want to make larger pizzas).
NOTE: To avoid the dough from sticking to the scraper, dip the scraper into water between cuts.
5. Sprinkle some flour over the dough. Make sure your hands are dry and then flour them. Gently round each piece into a ball.
6. Transfer the dough balls to the lined jelly pan and mist them generously with spray oil. Slip the pan into plastic bag or enclose in plastic food wrap.
7. Put the pan into the refrigerator and let the dough rest overnight or for up to three days.
NOTE: You can store the dough balls in a zippered freezer bag if you want to save some of the dough for any future baking. In that case, pour some oil(a few tablespooons only) in a medium bowl and dip each dough ball into the oil, so that it is completely covered in oil. Then put each ball into a separate bag. Store the bags in the freezer for no longer than 3 months. The day before you plan to make pizza, remember to transfer the dough balls from the freezer to the refrigerator.
8. On the day you plan to eat pizza, exactly two hours before you make it, remove the desired number of dough balls from the refrigerator. Dust the counter with flour and spray lightly with oil. Place the dough balls on a floured surface and sprinkle them with flour. Dust your hands with flour and delicately press the dough into disks about ½ inch thick and 5 inches in diameter. Sprinkle with flour and mist with oil. Loosely cover the dough rounds with plastic wrap and then allow to rest for 2 hours.
9. At least 45 minutes before making the pizza, place a baking stone on the lower third of the oven. Preheat the oven as hot as possible (500° F).
10. Generously sprinkle the back of a jelly pan with semolina/durum flour or cornmeal. Flour your hands (palms, backs and knuckles). Take 1 piece of dough by lifting it with a pastry scraper. Lay the dough across your fists in a very delicate way and carefully stretch it by bouncing it in a circular motion on your hands, and by giving it a little stretch with each bounce. Once the dough has expanded outward, move to a full toss.
11. When the dough has the shape you want (about 9-12 inches/ in diameter for a 6 ounce piece of dough), place it on the back of the jelly pan, making sure there is enough semolina/durum flour or cornmeal to allow it to slide and not stick to the pan.
12. Lightly top it with sweet or savory toppings of your choice.
13. Slide the topped pizza onto the stone in the oven or bake directly on the jelly pan. Close the door and bake for 5-8 minutes.
14. Take the pizza out of the oven and transfer it to a cutting board or your plate. In order to allow the cheese to set a little, wait 3-5 minutes before slicing or serving.

Tuesday, October 28, 2008

When It Gets Chilly, Make Chili

No comments:
I make and eat this year-round, but it's especially comforting in the cold months. I first found a recipe on Epicurious but have tweaked it a lot, cutting down the massive size of the recipe, cooking the bell pepper at the beginning instead of the end (too raw for me), and adjusting seasonings and ingredients. Instead of biscuits or cornbread, I spoon up the chili with tortilla chips. When I cook it for my sister, she asks me to make enough for leftovers.

CHILI
1 large onion, chopped
3 tbs vegetable oil
2 carrots, sliced thin
1 tbs minced garlic
1 green bell pepper, chopped
About 1½ lbs lean ground beef
1½ tsp cayenne pepper (more to taste)
1½ tsp ground cumin
1½ tsp dried oregano
1 tbs paprika
1½ tsp red pepper flakes
8 oz can chopped tomatoes, drained
3 tbs tomato paste
6 oz beef or chicken broth
14 oz can red kidney beans
1 bag tortilla chips, preferable in the "scoops" shape

In a large pot or dutch oven, saute the onion and green bell pepper in the oil until the onion is translucent, then add carrots and garlic. Cook and stir for 1 minute. Add the beef, breaking it up and cooking until browned.

Add the cayenne, cumin, oregano, paprika, and red pepper flakes and stir. Add the tomatoes, tomato paste, and broth. Bring to a simmer and cover, cooking for 1 hour. Add the beans and cook 15 minutes more. Taste and add more cayenne if desired.

Friday, October 24, 2008

The Best Pumpkin Tart/Pie

No comments:
This pumpkin pie is different. It's smoother and mellower than your usual pumpkin pie, and has the versatility of being dressed up as a fancy tart. I love it chilled, but some want it warm. I also make mine more festive with a few cutouts from leftover pie dough. Top it off with a dollop of freshly whipped cream, and it feels like the holidays!

Dorie Greenspan's Sour Cream Pumpkin Pie (or Tart)
9-inch single crust, partially baked and cooled *recipe below*
2 cups canned unsweetened pumpkin puree
3 large eggs, at room temperature
1 cup (packed) light brown sugar
2 tbs unsalted butter, melted and cooled
1½ cups heavy cream
⅓ cup sour cream
1½ tsp ground cinnamon
1½ tsp ground ginger
Pinch of ground cloves (I omitted)
Pinch of freshly grated nutmeg
Pinch of salt
3 tbs dark rum (I also omitted)
2 tsp pure vanilla extract

Center a rack in the oven and preheat it to 450°. Line a baking sheet with parchment or a silicone mat and put the pie plate (or tart pan) on it.
Mix together all the filling ingredients, then pour into the crust. Bake for 10 minutes, then reduce the temperature to 300° and continue to bake for 35 to 45 minutes longer (20 to 25 minutes for a tart), or until a knife inserted close to the center comes out clean. Cool to room temperature.
You'll have filling left over if you make a tart, but use it to make mini-tarts or possibly another tart.
I used Martha Stewart's pate brisee because I know it like the back of my hand, but here's Dorie's pie dough recipe.

3 cups all-purpose flour
¼ cup sugar
1½ tsp salt
2½ sticks cold unsalted butter, cut into pieces
⅓ cup cold vegetable shortening, cut into pieces
About ½ cup ice water

Pulse the flour, sugar, and salt in a food processor fitted with a metal blade. Drop in the butter and shortening and pulse only until the fats are cut into the flour. Pulsing on and off, gradually add 3 tbs water, then use a few long pulses to get the water into the flour. Pulse in as much of the remaining water as necessary to get a dough that will stick together when pinched. Lightly knead the dough into a disk and wrap in plastic. Refrigerate for at least 1 hour before rolling.
To partially bake the crust, preheat the oven to 400°. Butter one side of a sheet of aluminum foil and place that down on the crust. Fill the foil with dried beans or rice or pie weights. Put the pie plate on a baking sheet and bake for 25 minutes. Carefully remove the foil and weights, and if the crust has puffed, press it down gently with the back of a spoon. Return the pie plate to the oven and bake for 8 minutes more, or until the crust is very lightly colored. (I skipped the 8 minutes when making the tart.) Cool to room temperature before filling.